With the recent push for digital resources, many teachers feel they are no longer able to use their tried and true print resources. In this post, I share how to create a digital worksheet in four easy steps.
In 1937, during a polio epidemic, several school districts closed and delivered instruction through the radio*. The radio. 🤔
Besides showing the importance of technology in our lives, this story also reminds us that we can make learning happen, no matter the circumstances.
When schools across the country closed in March of 2020, one of the most immediate challenges expressed by teachers was in regard to sharing print resources from a distance.
Since the majority of resources used in schools prior to the 2020-2021 school year were print resources, this posed a huge challenge. It takes some adaptation, but there are ways to utilize print resources in a virtual world.
From Print to Digital
Now, as we forge a new frontier with digital tools and technology at the helm, I want to share ways you can repurpose your tried and true print resources to create digital activities you can use for small group math instruction.
From task cards to traditional math worksheets, you can transform them in minutes using my four simple steps that show you how to create a digital worksheet.
How to Create a Digital Worksheet
Before getting started, it’s important to make sure you have permission to save print resources in a digital format. Since the start of the pandemic, many teacher-authors and publishers have given their permission to do this; however, it’s essential you double-check to be sure.
1. Save your worksheet as an image.
This step is the most important because it will dictate the quality of the activity you create. There are several ways to convert your print resource into an image. If you find that one method creates a blurry image, try using a different method.
If your resource is printable, like a worksheet you pulled out of a file cabinet or a set of task cards you have in your lesson binder, you can do one of the following:
- Download the CamScanner App to your phone, open the app, scan the printable, and save the object as a JPG file.
- Use the scanner on your home printer to scan the printable and save it as a JPG file. (Note: Some fancy school copiers will allow you to scan a document and send it to your email. Once you do this, use the directions below to convert the PDF copy you receive into an image.)
If your resource is in PDF format, like a digital resource you downloaded from Teachers Pay Teachers, you can do one of the following:
- Use the snipping tool on your computer to extract an image from the computer screen. Then, save the extracted image as a jpg file.
- Go to Smallpdf.com. Use the “PDF to JPG” tool to convert a page from your PDF into a jpg file. (Note: Smallpdf.com is a paid resource; however, they do offer a limited-use free account.)
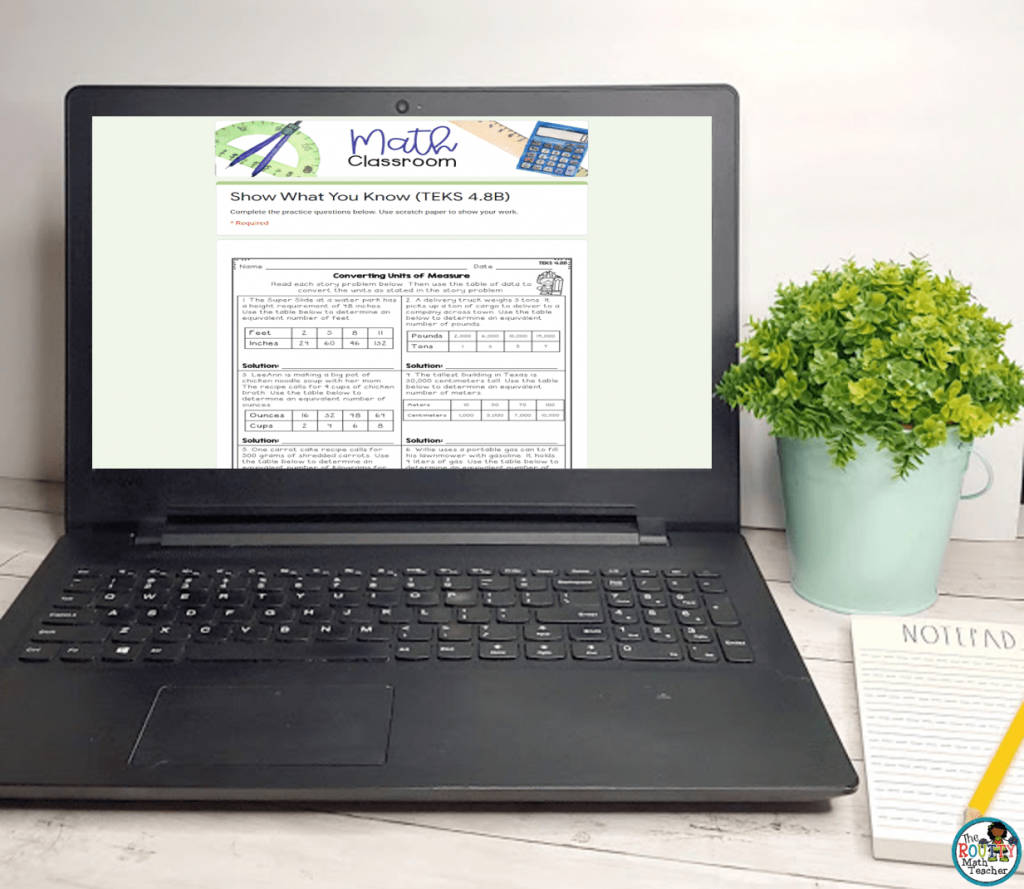
2. Upload the image in the background of a slide in Google Slides or add it as an image in Google Forms.
There are two ways to use the image you saved.
First, you can upload the image to Google Slides and add an interactive layer with text boxes so students can respond to each question.
- Open Google Slides.
- Go to File > Page Setup.
- Change the size to 8.5 x 11 (inches) to get a slide that resembles the size and orientation of a worksheet.
- On the toolbar, select Background.
- Click “Choose Image” and navigate to the image file on your computer.
- Wait for the image to load.
Second, you can upload the images to Google Forms and add questions so students can respond to the questions on the worksheet.
- Open Google Forms.
- Customize the form, such as changing the colors and adding a header, title, directions, and place for students’ names.
- Move to the last prompt/question on your form and click the image button on the right-hand toolbar.
- Navigate to the image file on your computer.
- Wait for the image to load.
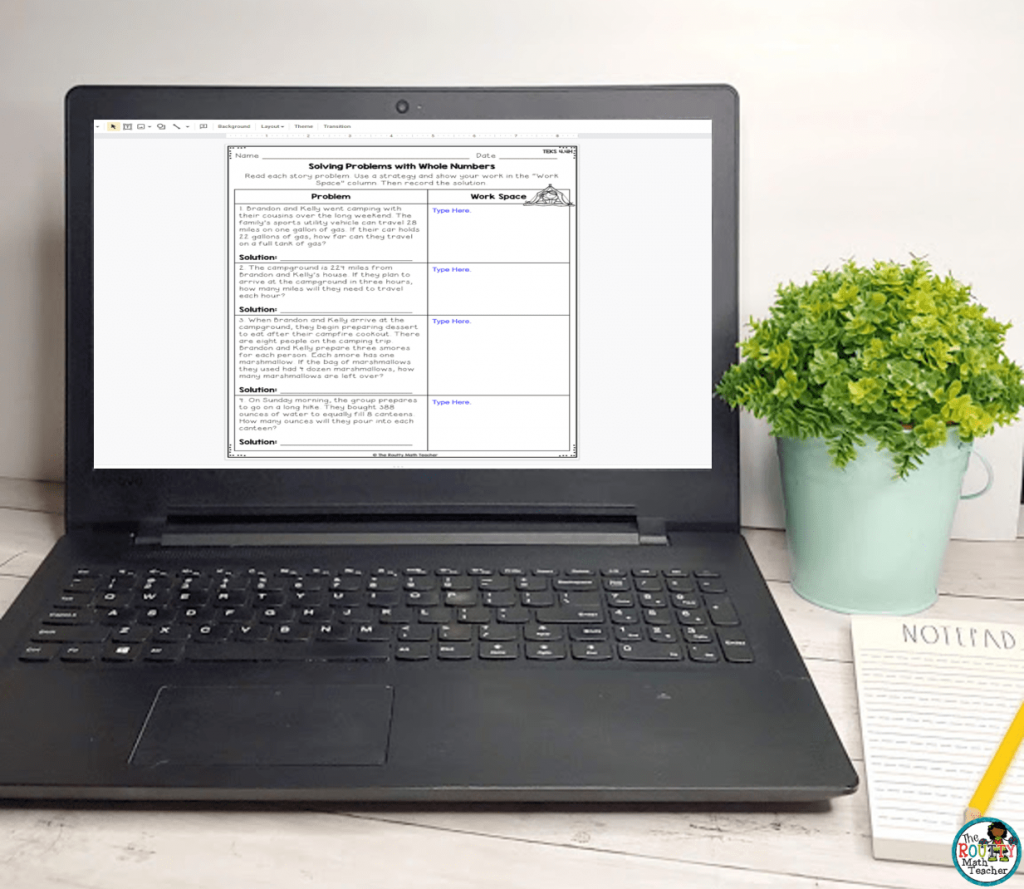
3. Add an interactive layer to the slide or add questions to the form.
Once you set-up your digital worksheet, it’s time to add a place for students to answer the questions.
On the Google Slides worksheet, you’ll add an interactive layer with text boxes.
- Go to Insert > Text box.
- Drag the textbox to the place where you want students to respond to the questions.
- Inside each textbox, write “Type Here” so students will know where to type their answers.
- Repeat the process for each question.
On the Google Forms worksheet, you’ll add questions so students can complete the worksheet.
- Be sure you are in the section where your image is located.
- Click the plus sign on the right-hand toolbar.
- When the new question appears, use the dropdown menu to select “Short Answer.”
- Then, copy the question directly from the worksheet or write “Question #___” so students know where to answer each question.
4. Share the digital worksheet with students via link, email, or Google Classroom.
There are three basic ways to share the document with students, including with a direct link to the document, via an email to each student’s inbox, or by adding it to an assignment in Google Classroom.
A. To share via a direct link to the document:
Sharing in Google Slides:
- In Google Slides, click the Share button.
- Change the settings by selecting “Anyone with the link may view”.
- Click “Copy Link”. Then, click “Done”.
- Paste the link in a new browser window.
- Highlight the part of the link that appears after the last forward slash.
- Delete the text.
- Type “copy”.
- Highlight the new link and copy the text using Ctrl + C or right-click and select Copy. (This creates a new version of the document for each student so they are unable to edit your original.)
- Share the link with students.
Sharing in Google Forms
- In Google Forms, click the Send button.
- Next to Send via, select the link icon (the second one).
- Click “Copy.”
- Share the link with students.
B. To share the document via email, use the directions above to grab the link and send it to students’ email addresses. (Note: For Google Forms, you can also click the envelope icon next to Send via after clicking the Send button. Complete the prompts and click Send to share the form with students.)
C. In Google Forms, create a new assignment and complete the desired fields. Then, click the Add button. From the dropdown menu, select Link or Google Drive.
If you select Link:
- Use the directions above to create a link.
- Add the link to the pop-up box.
- Click Assign.
If you select Google Drive:
- Navigate to the file in your drive.
- Select the file and wait for it to populate. If using Google Slides, be sure to select “Make a copy for each student” in the dropdown menu so students cannot edit each other’s work.
- Click Assign.
Finishing Touches
That’s it! You’re all set! Repeat the process for each digital worksheet you create.
Need more detailed steps? Use the form below to download a guide to creating digital worksheets.
Sound Off!
How do you use digital worksheets in your classroom? What other resources have you “digitized”? Respond in the comments below.
*Source: https://theconversation.com/remote-learning-isnt-new-radio-instruction-in-the-1937-polio-epidemic-143797

